How To

Then vs Now

Well hello there!

Today on the blog is a personal post. This past summer was my two year anniversary of shooting and I was looking through photos of my first few shoots and I was amazed at how far I've come. I still have a lot to learn and I'm working on perfecting and understanding my craft and style but my images are better now that I have more understanding of my camera, light, editing, etc. 

I also wanted to share this post today because I have a heart for encouraging people in the process of what they're learning. I am passionate about being real in a "social media highlight reel" life because we don't get to see the behind the scenes stuff on Facebook. We don't get to see the work and practice people have put into their craft and we don't hear about their insecurities or struggles. We just get to see the best of everyone's lives. I have put so much work into my photography and I'm constantly studying images I love. I have had shoots that I've hated and I have had shoots that I have thought were my best work. If you look back through my Facebook page you'll see how I have progressed and I'm not ashamed. I just want to be real and show you where I have come from and that practice makes perfect.

So with all of that said, here are a few then vs now's of my photography:

(and yes, we did recreate some of the poses on purpose) 

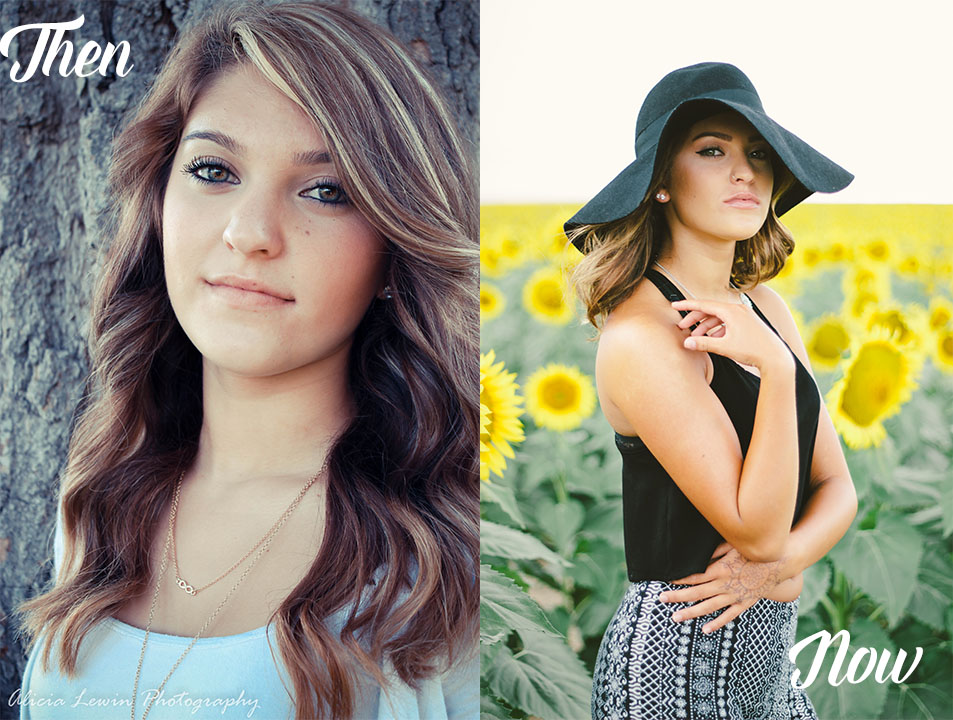
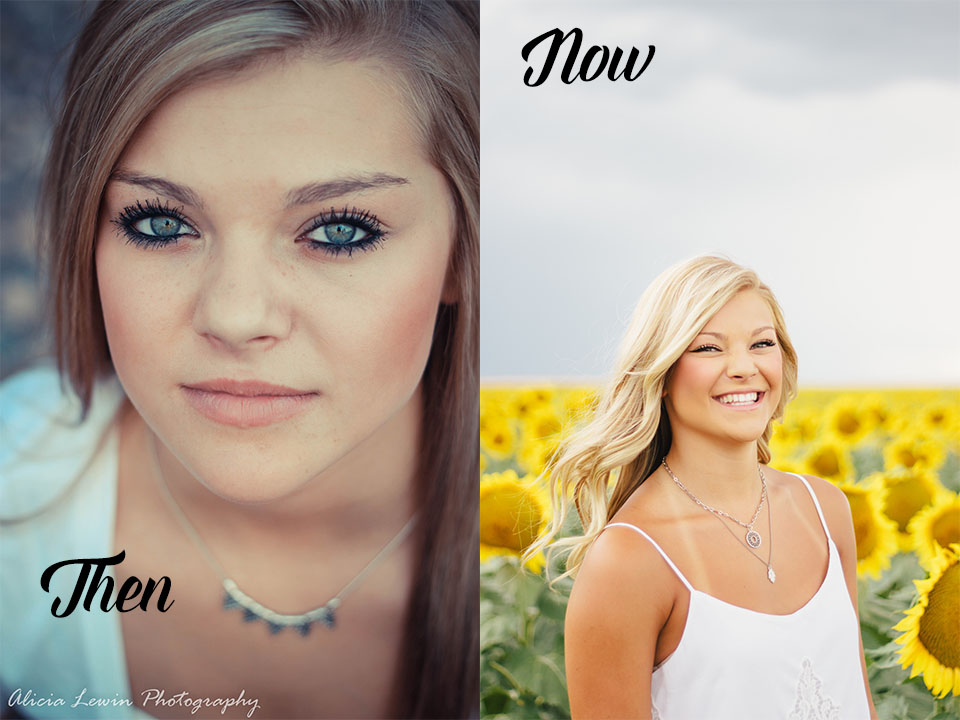
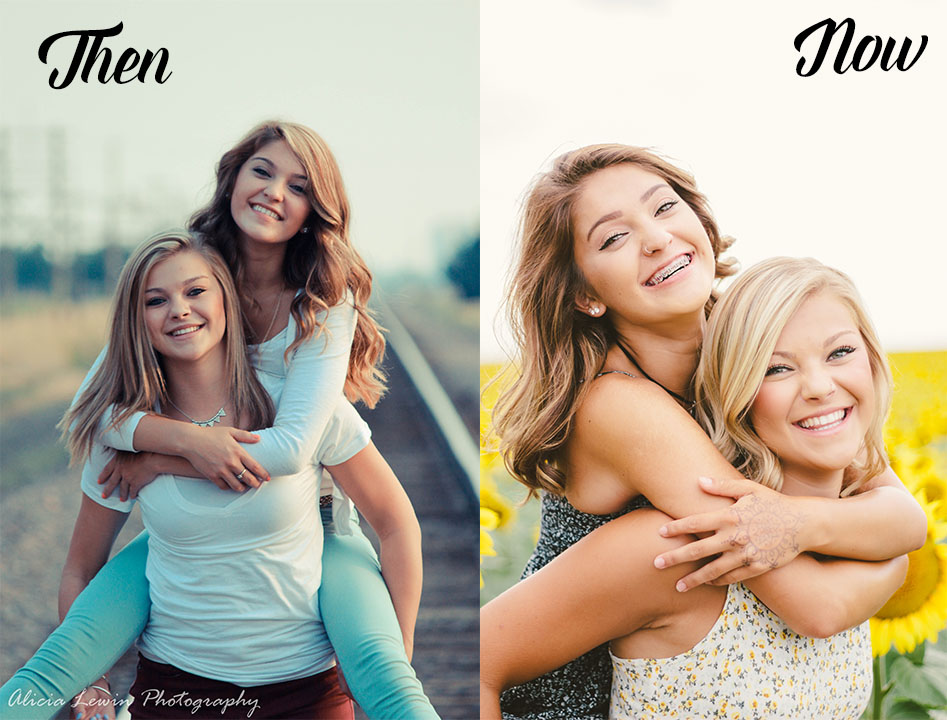
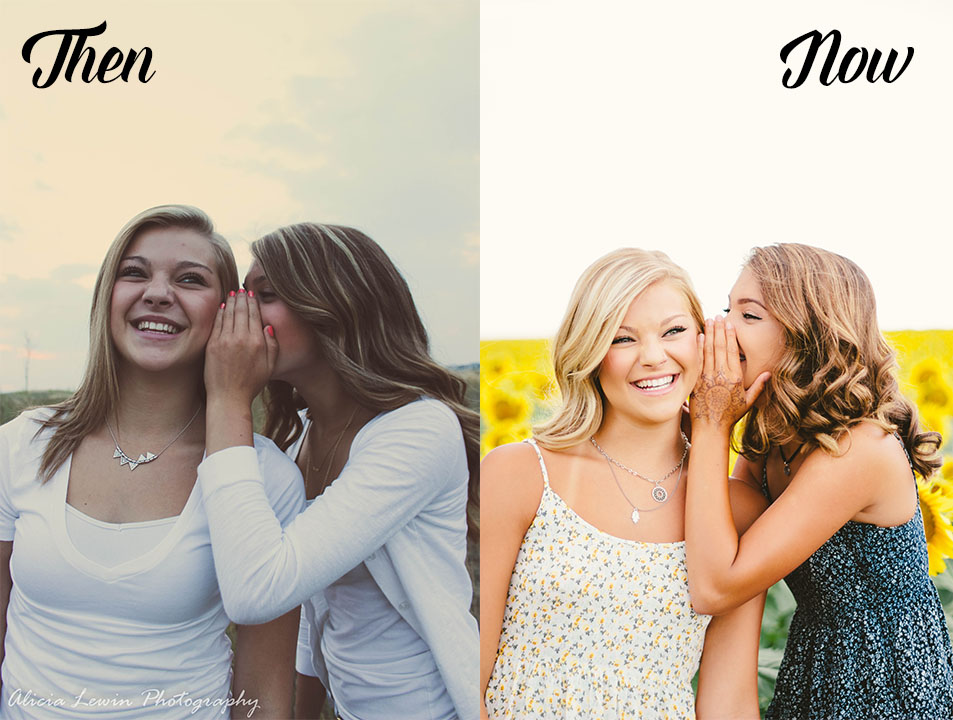
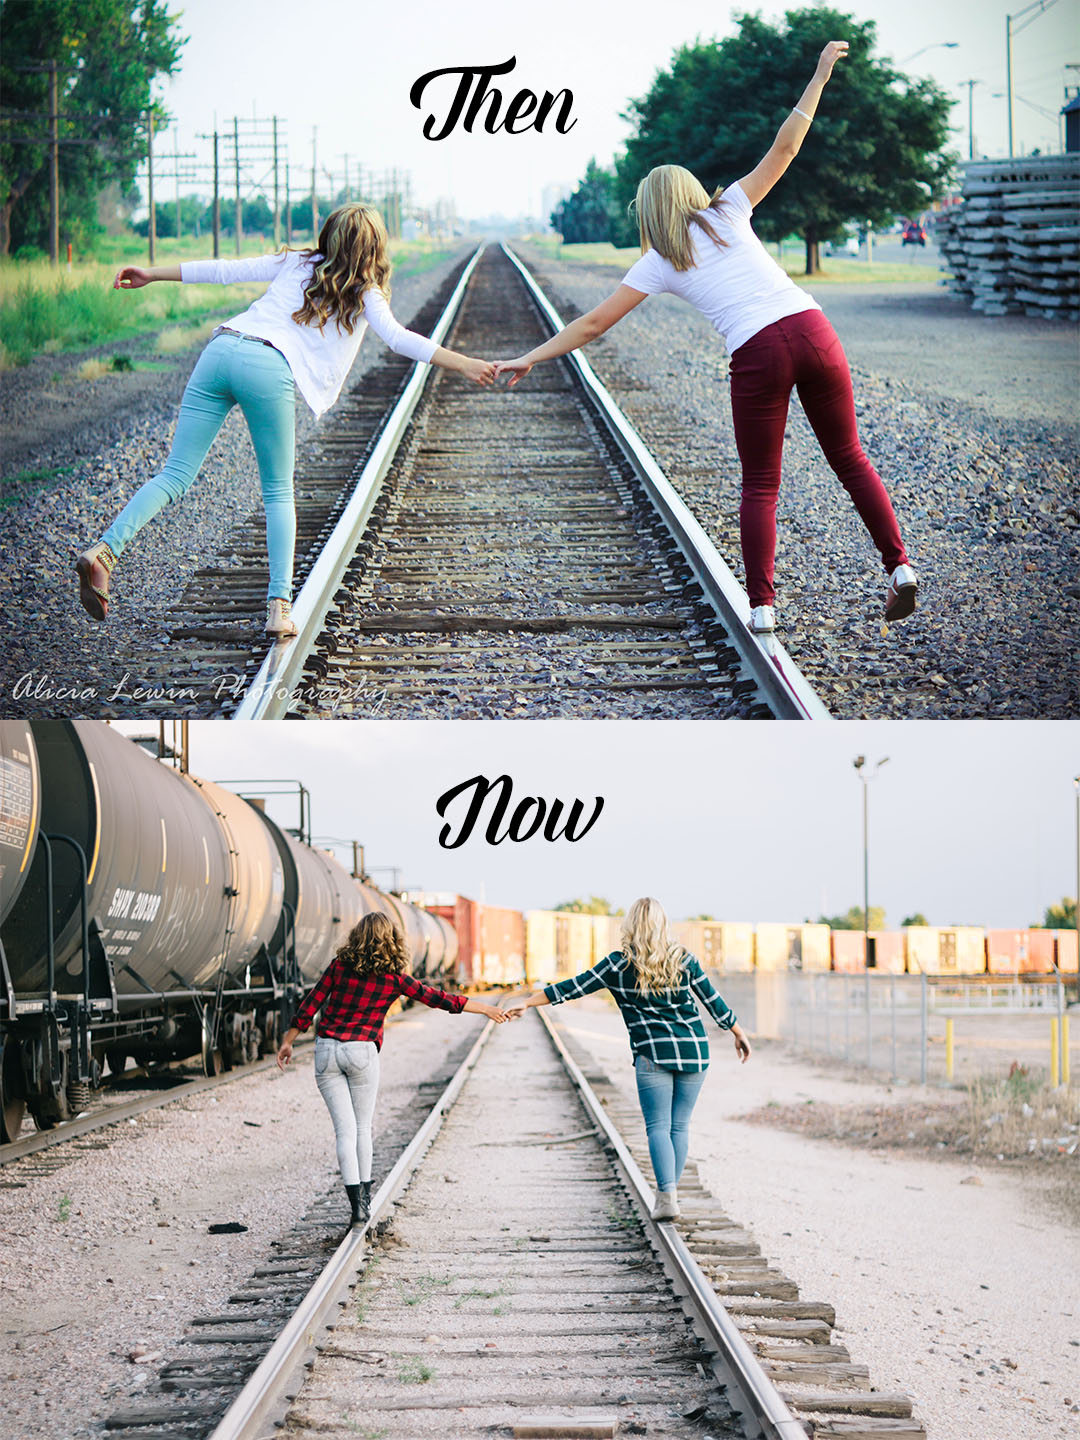
As you can see, I have learned a lot! Understanding the settings of my camera have been huge! Sometimes I still feel stupid when using my camera because I'm self-taught but generally, I know what to do when I'm shooting. I just don't always know what the technical term is for something or that it even has a name lol.

Also paying attention to light has been crucial. You can get so many different looks in an image depending on where you place your subject in relation to the sun. I still have a lot to learn about lighting, but I feel mostly confident about it.

Lastly, editing. Need I say more? As you can tell my "then" images were oddly colored. The girls almost look pale and their shirts are supposed to be white but have a tinge of blue in them from the editing I did. One thing I've learned about editing is to keep the colors true, unless you're intentionally trying something artistic of course- but in this case, I was not trying to be artistic lol.

So there you go. I hope this post encourages you to keep going and to keep practicing whatever it is you're working on. No one likes the process but it is literally the most important part of the journey. We'll all get there one day.

Alicia

8 Tips That’ll Make Your Instagram Photos Look Pro + Apps

Well hello! 

I hope that you're ready to get your Instagram photos looking pro because I have some good tips for you! Instagram has become a very popular social media platform for everyone from the stay at home mom to large companies like Anthropologie. It has turned into an amazing tool for us to share our everyday lives and for large and small business owners to get in front of their customers and give people the inside scoop of their personal lives and businesses. So if you're wanting to take better photos of your kids at home or if you're wanting to post better photos as part of your business branding then these tips will help you get started! 

Tip #1- Wipe your lens- Start off by wiping your smartphone camera with your shirt. You would be surprised how much better your photo will come out if your lens is clean.

Tip #2- Use the camera- Don't take your photos with your Instagram app because the resolution isn't really the best. Take it with your actual camera and then import it into Instagram once your done editing it.

Tip #3- Focus feature- Use the focus feature by tapping what you want to be in focus on your screen. You can also adjust your lighting(on iPhone) by tapping on what you want to be in focus then dragging the little sun icon on the screen up to make it brighter or down to make it darker.

Tip #4- Use natural light- When taking a picture try to move your subject toward a window or just go outside. Natural light makes all photos 10x better! Your pictures will come out clearer and won't look yellow which is important!

Tip #5- Get closer- Don't zoom to get a closer picture. If you do your picture comes out grainy, pixely, or blurry. Instead walk closer to your subject or take the picture and then crop it.

Tip #6- Remove clutter- It's always better to lose the clutter from your photos. If there is a lot going on in your image look for a way to remove some of it whether that be changing an angle or changing locations.

Tip #7- Background is important- Look for the best background so that your subject can be the focal point of your image.

Tip #8- Edit your photos- Don't worry, all of the best Instagrammers edit their photos in some way. Make sure to brighten it up if it seems dark or up the contrast to get a little bit of a "pop" in your photos. Don't over do it on the filters though. You want to try to keep the true color of the object you are photographing unless, of course, you want to do it on purpose for an artistic touch.


Apps I Use:

#1- VSCO: I usually only use one app to edit my photos and that would be VSCO Cam. I really like the filters they offer for free as well as ones you can purchase and I feel like it's pretty easy to upload, edit my photos, and save them.

#2- Afterlight: If I don't use VSCO for any reason my second choice is Afterlight. I also like the filters they have and if I'm feeling funky, I like the different frame options they have as well as the light leaks I can add to the photo.

#3- Studio: Every once in awhile I will put text on my photos and if I do, it's usually with this app. You can download sayings, shapes, seasonal graphics, etc. Sometimes it's nice to change things up! 


I hope that these tips will give you something to think about when your taking your next photo for Instagram. Do you have any other tips you would like to add or do you know of any cool apps to use to get great photos? Comment below and let me know.


Alicia